Experiments

Synthetic Lattice

Continuing on the experiments in expanding the formation of the synthetic human I wanted to explore shapes that can be malleable once printed. This led me to experiment with lattice structures, which in their basic form can be used as exoskeletons and in the creation of moveable garments. Initially I wanted to try this in considering the creation of synthetic lungs in a future experiment whereby they can expand and contract as if breathing. A lattice structure when given the texture of skin also has the quality of bio systems and somewhat mimics the biological construction of skin cells. Exposing this gives a very creepy quality and further works to show the synthetic nature of what I am trying to create. Also when used for the mouth section allows you to see the synthetic teeth in their entirety, giving the effect of a window in to the inner workings of the human.

Ultimately this could be extremely effective if printed with Filaflex 3D printing filament that has the properties of rubber and can be deformed, twisted and manipulated and return back to form.

Standard
Experiments

Synthetic Shoulders

As an expansion outwards from focusing on the mouth I have explored rendering other elements that form the human voice, initially I have kept this to the shoulders as taken from a Photoscan experiment to see how this may come together. This gives an interesting effect to form a more complete synthetic transformation of the human and ground the mouth in a wider context. The shoulders here from Photoscan while derived from the human actually appear to give the effect of a neck brace supporting the head, I find this further connection to prosthetics interesting. I also tried this with taking the shoulder section of the Photoscan head from Project 1, as this was produced in more controlled conditions to see if the overall effect is altered. I want to take this further to include more fully synthetic elements like the teeth, such as the creation of a windpipe from scratch in Blender. Then, as shown here with the teeth, these fully synthetic elements can be exposed as such in the material used to texture and later to create them physically. Playing on the vivid colours of plastic to communicate its man-made qualities I have textured the teeth in bright orange and applied a glossy surface to show it is a prosthetic addition.

Standard
Experiments

Synthetic Mouths – 3D Printing

I did a prototype 3D print test of the 3D scanned mouths as part of my choir, these were done in three different experiments using white, gold and aluminium filaments. The main experiment consisted of printing four versions out of the twelve mouths using white filament and using a higher quality printer which created the structural supports in a different material white can be dissolved away. White was used as a way to show the synthetic quality and remove the textural traces of the human skin and to fully absorb it, through the process of printing, into the machine. This works well, but perhaps there is further to explore in terms of what colour or texture would effectively show the synthetic. I also printed out four sets of the teeth in the same material to test how they work when combined with the mouth, again these are very effective and provide the notion of prothesis as part of the cyborg theory.

To experiment with different materials in order to communicate the notion of the cyborg I printed out a version of the mouth in both gold and aluminium. The use of metallic filament gave a very interesting effect, with an essence of technicity not fully apparent with the white filament. Whilst these are interesting I feel it is a slightly obvious choice and takes the mouth away from the synthetic plastic that has created it.

Standard
Experiments

JavaScript Animation (cont.)

After a tutorial with James Field on 19/05/2016 we went through how to use JavaScript to access and read the level of a laptop’s internal microphone and then make this level affect an object’s animation. James set me up with the code that initially reads audio input level using getUserMedia and then the code mathematically analyses this to show a level value:

var max_level_L = 0;
var old_level_L = 0;
var level;

window.AudioContext = window.AudioContext || window.webkitAudioContext;
navigator.getUserMedia = navigator.webkitGetUserMedia || navigator.mozGetUserMedia;

var audioContext = new AudioContext();

navigator.getUserMedia(
{audio:true, video:true},
function(stream){
var microphone = audioContext.createMediaStreamSource(stream);
var javascriptNode = audioContext.createScriptProcessor(1024, 1, 1);

microphone.connect(javascriptNode);
javascriptNode.connect(audioContext.destination);
javascriptNode.onaudioprocess = function(event){

var inpt_L = event.inputBuffer.getChannelData(0);
var instant_L = 0.0;

var sum_L = 0.0;
for(var i = 0; i < inpt_L.length; ++i) {
sum_L += inpt_L[i] * inpt_L[i];
}
instant_L = Math.sqrt(sum_L / inpt_L.length);
max_level_L = Math.max(max_level_L, instant_L);
instant_L = Math.max( instant_L, old_level_L -0.008 );
old_level_L = instant_L;
level = instant_L/max_level_L / 10;
}
},
function(e){ console.log(e); }
);

Once we have this value we can assign the level as a variable, then in turn tell the object to animate accordingly. This used the following in order to do so, here we needed to make sure that the animation wasn’t trigged until both the object had loaded and the level was reading a number greater than 0:

var render = function () {
requestAnimationFrame( render );
if ( mouth ){
if(level > 0){

Then I could begin to animate the object in different ways, initially I have kept this very basic using transformation tools rotation, scale and opacity. The rotation code states that the level is multiplied by 90 in order to make the rotation of the object turn the full 360 degrees. If the level is multiplied by 20 then the face only rotates 90 degrees and as such the movement isn’t quite large enough to be noticeable through audio input. The scale was tested using both x (multiplied by 20) and x + y (multiplied by 20). This works better with the object only being scaled by the x OR y-axis as both together makes the animation awkward and throws out the placement of the initial object. The opacity was slightly trickier to implement, as we are dealing with a 3D object the opacity is as such defines by the material/texture. For this reason we cannot purely say model.opacity, we must first change the variable material to include a transparency using transparent = true. Then we can say material.opacity = level and in this case was again multiplied by 20 to be noticeable and produce an effective reduction back to transparent. The code for each was set up as followed:

mouth.rotation.y = level * 90; (for face all the way round)

mouth.rotation. y = level * 20; (for face half way round)

mouth.scale.x = level * 20;

var material = new THREE.MeshLambertMaterial( { map: texture, transparent: true} );

material.opacity = level * 20;

Following on from this I combined each of the three experiments into one scene, where each object is animating different based on the levels input from the audio. This again was initially difficult, I needed to first work out how to have multiple objects and also have them defined separately. This meant naming each uniquely and I did this in a one, two, three format. I then needed to work out how the opacity animation could have a separate material variable applied, as if the transparency is applied to the single material it then adds this to all objects in the scene. This again meant creating a new set of variables and naming them uniquely. The code as such became:

Material:
var material = new THREE.MeshBasicMaterial( { color: 0x00ff00 } );
var texture = new THREE.ImageUtils.loadTexture( “mouth3d8_smooth.jpg” );
var material = new THREE.MeshLambertMaterial( { map: texture } );

 var materialthree = new THREE.MeshBasicMaterial( { color: 0x00ff00 } );
var texturethree = new THREE.ImageUtils.loadTexture( “mouth3d8_smooth.jpg” );
var materialthree = new THREE.MeshLambertMaterial( { map: texture, transparent: true } );

Object:

var mouthone;
var mouthtwo;
var mouththree;

// instantiate a loader 1
var loaderone = new THREE.OBJLoader();
// load a resource
loaderone.load(
// resource URL
‘mouth3d19.obj’,
// Function when resource is loaded
function ( objectone ) {
objectone.traverse( function ( child ) {
if ( child instanceof THREE.Mesh ) {
mouthone = objectone;
child.material = material;
//child.material.map = texture;
objectone.position.y = – 1;
objectone.position.x = 6;
scene.add( objectone );
}
} );
}
);

// instantiate a loader 2

var loadertwo = new THREE.OBJLoader();
// load a resource
loadertwo.load(
// resource URL
‘mouth3d19.obj’,
// Function when resource is loaded
function ( objecttwo ) {
objecttwo.traverse( function ( child ) {
if ( child instanceof THREE.Mesh ) {
mouthtwo = objecttwo;
child.material = material;
//child.material.map = texture;
objecttwo.position.y = – 1;
objecttwo.position.x = 6;
scene.add( objecttwo );
}
} );
}
);

// instantiate a loader 3

var loaderthree = new THREE.OBJLoader();
// load a resource
loaderthree.load(
// resource URL
‘mouth3d19.obj’,
// Function when resource is loaded
function ( objectthree ) {
objectthree.traverse( function ( child ) {
if ( child instanceof THREE.Mesh ) {
mouththree = objectthree;
child.material = material;
//child.material.map = texture;
objectthree.position.y = – 1;
objectthree.position.x = 6;
scene.add( objectthree );
}
} );
}
);

camera.position.z = 10;
var render = function () {
requestAnimationFrame( render );
if ( mouthone ){
if(level > 0){
mouthone.scale.x = level * 20;
}
}
if ( mouthtwo ){
if(level > 0){
mouthtwo.rotation.y = level * 90;
}
}

if ( mouththree ){
if(level > 0){
materialthree.opacity = level * 20;
}
}
renderer.render(scene, camera);
};
render();
</script>
</body>
</html>

Standard
Experiments

Pitch Shifting (cont).

Next I tested the pitch shifting technique using digital tools, following on from my meeting with Craig Bratley who went through the way I could split one input through 4 speakers I tested the pitch layering using Adobe Audition. This is effective to allow for greater control over the changes in pitch, you can input a value yourself and this can be in point increments. I tested this using just an input from a laptop internal microphone and then four different pitch effects added to each track. I used the range from +1.5 to -2, it seems with the digital the higher pitches are more prominent which meant that at +2 this overpowered the lower pitches making them harder to notice. Capping this at +1.5 created a more stable overall effect, where you can pick out each of the pitch changes even when layered together. I feel the digital tool will work better for my project as it again brings in the synthetic and further communicates this synthetic translation of the natural voice.


Screen Shot 2016-05-17 at 13.55.17

Screen Shot 2016-05-17 at 13.54.57

Standard
Experiments

Pitch Shifting

As part of my experiments in creating the audio elements of the cyborg choir I tested the more analogue output of using a AX3000G Modeling Signal Processor guitar pedal. This uses a microphone input and an amp output, then the effect of pitch shifting applied in order to manipulate the voice. Eventually I want to test this with a loop pedal included, that way the different pitches can be recorded and looped to allow you to realtime layer this for output. This does work quite well and allows you to control the steps in pitch, I used a range from +2 to -4 as this alters the voice without defending into the realm of the ‘robot’ voice. I then layered them afterwards to give the effect of the choir performing, when overlayed you do hear the lower pitches are the more dominant but overall the effect has a synthetic quality that combines the natural and machine.


IMG_2124

IMG_2128

Standard
Experiments

JavaScript Animation

After speaking with James Field on 11/05/2016, he suggested it would be good to consider and begin experimenting with the physical output in combination with a visual output. James suggested JavaScript may be the best way to achieve this to create a dynamic animation that could respond to the levels of an audio input. This could be a computer capturing the sound of the choir installation, then capturing the level to give a value (i.e. between 0 and 100) that then alters/begins an animation. This animation could potentially include opacity, colour value, position, scale etc. Initially for my Project 2 hand-in this can be a very basic solution that can be developed further into a more complex solution for the final Project 3 outcome.

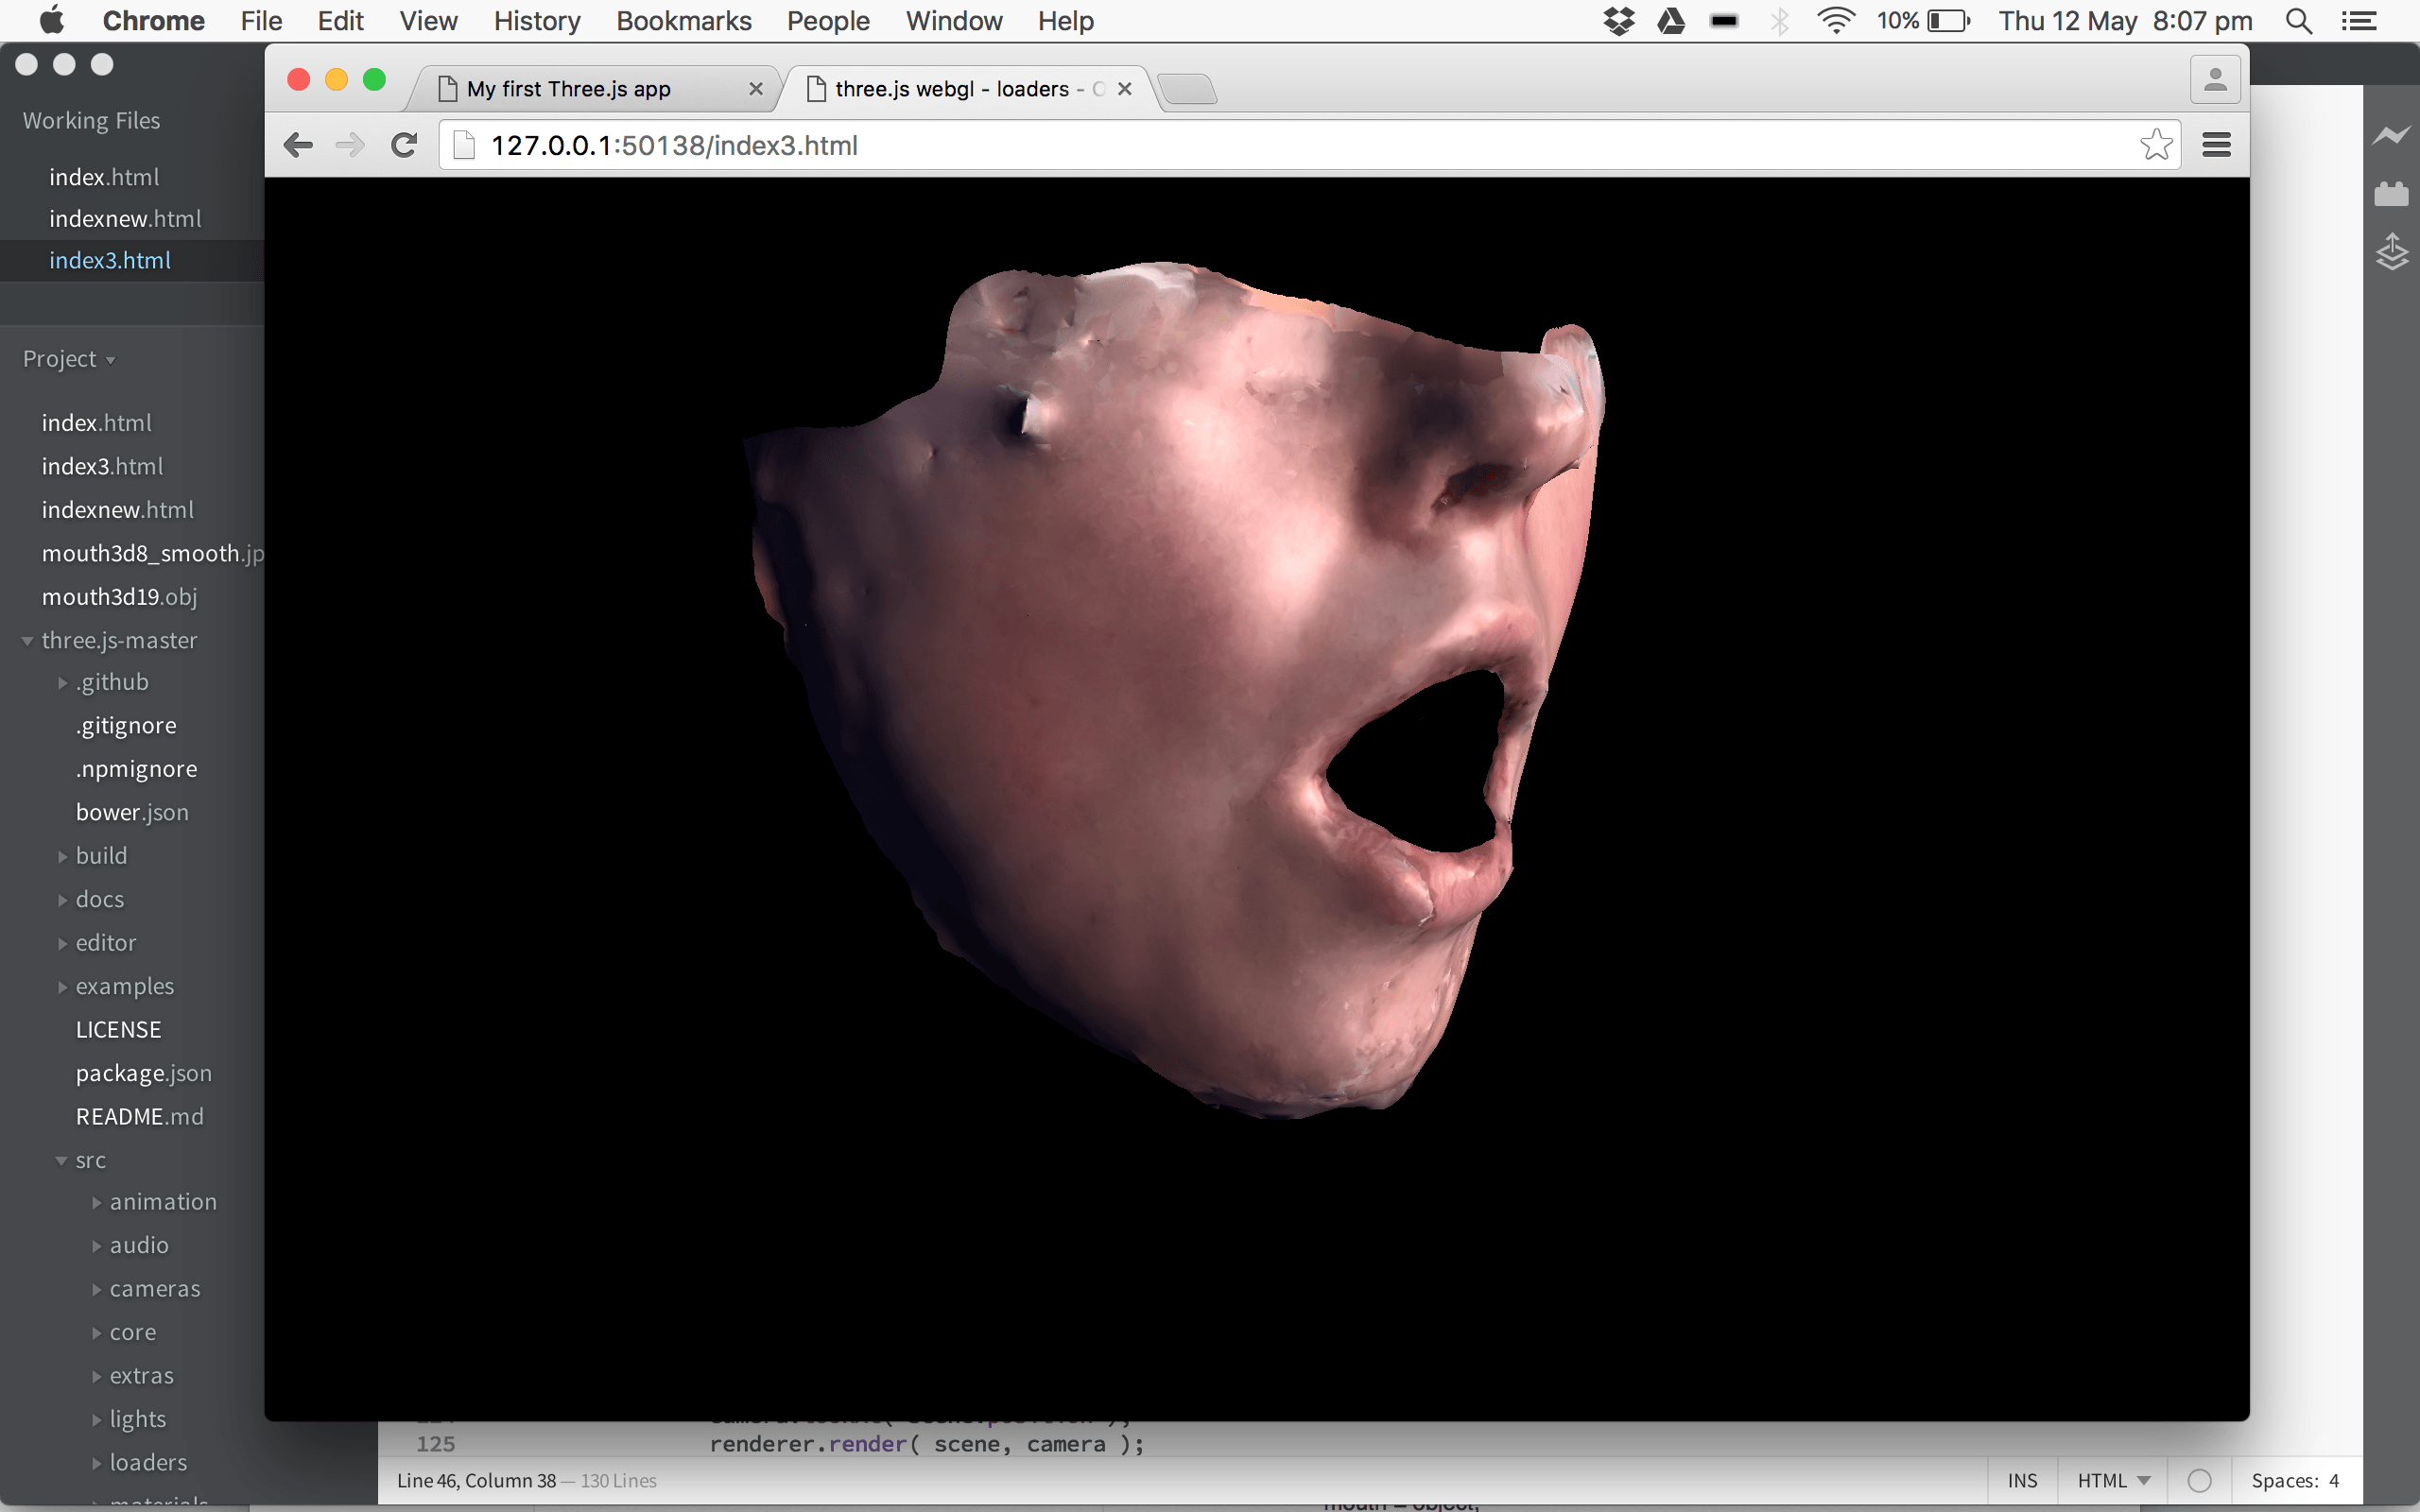
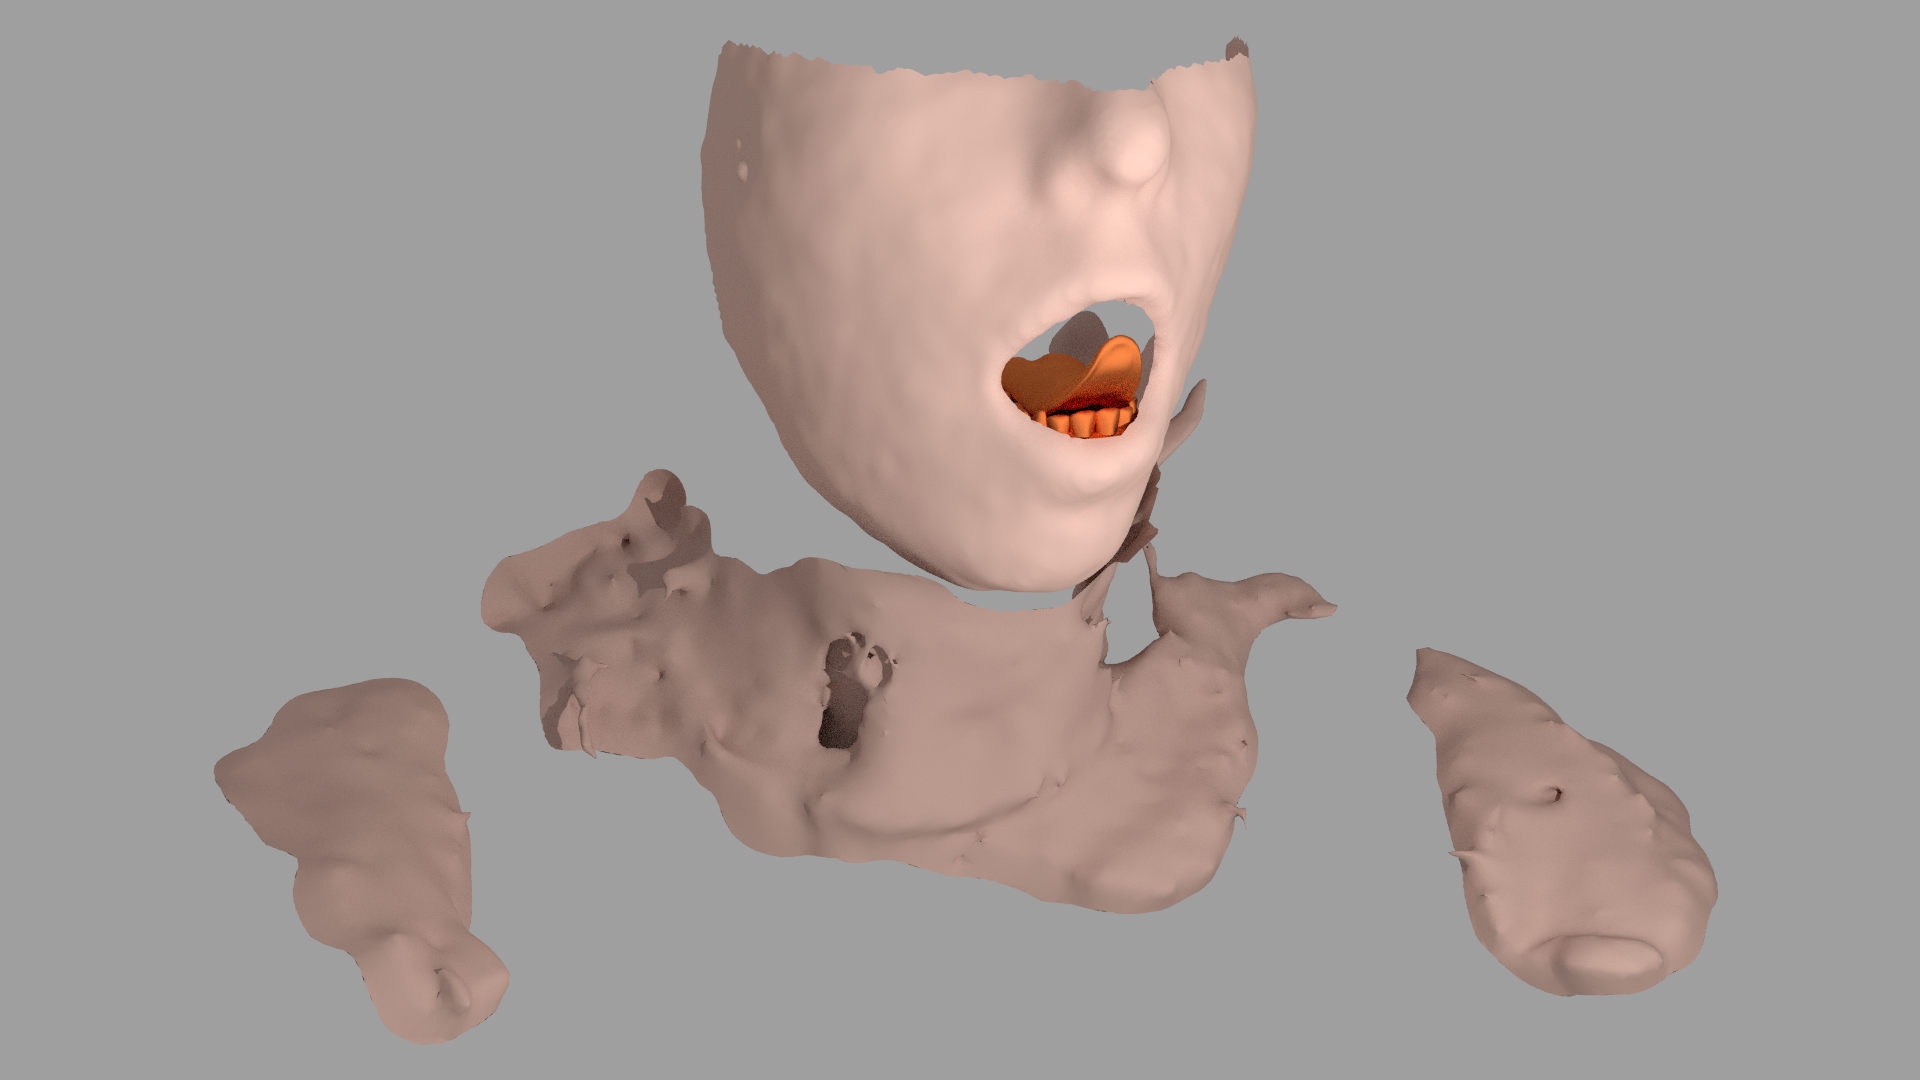
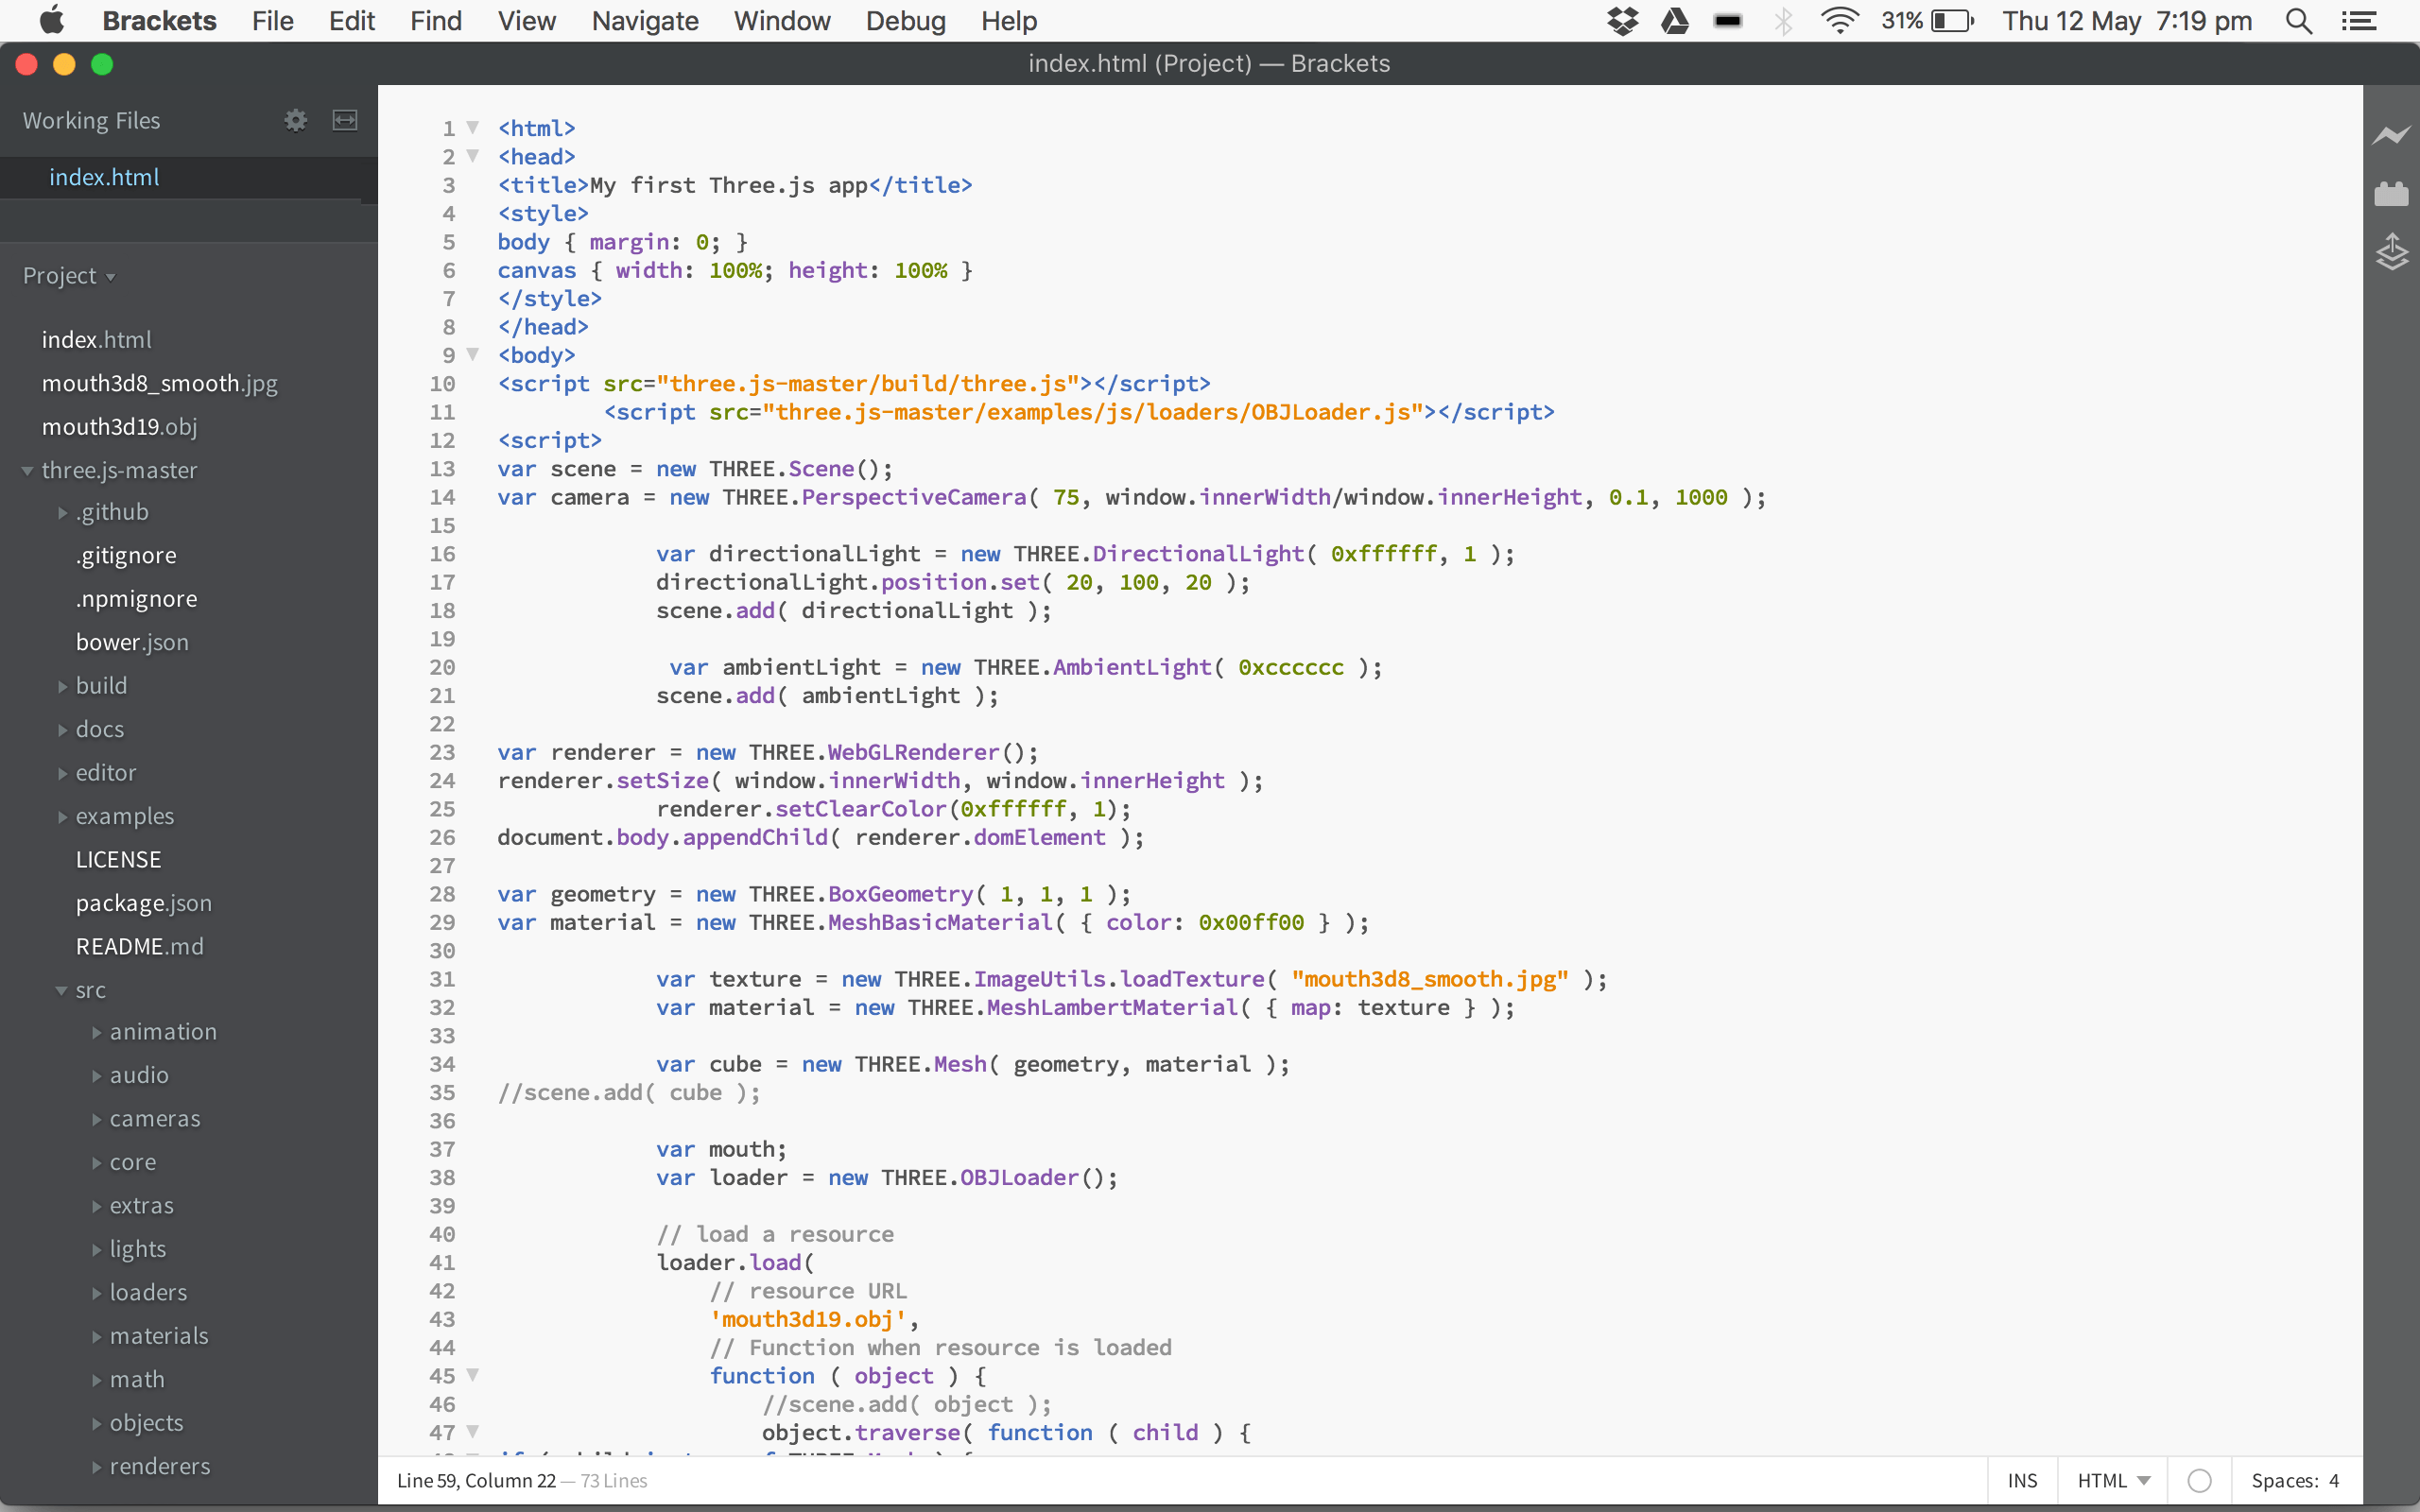
I initially tried to get to grips with JavaScript thanks to some links James sent me, I began with the simple creating a scene tutorial here http://threejs.org/docs/index.html#Manual/Introduction/Creating_a_scene. This was useful to understand how the different sections of code work and most importantly how scripts are needed in order to load in different files/aspects. Next I attempted instead of the cube to have a .obj file load, I didn’t get very far on this myself due to my lack of knowledge of JavaScript. James helped me out and got me started, explaining the process of adding the script for an obj loader and then loading the actual file and texture. After I got to grips with this I tried it out for myself and added a rotation element to begin animation experimenting. The effect is interesting and I think with the dynamic aspects added it can be very effective.

Here is the code:

<html>
<head>
<title>My first Three.js app</title>
<style>
body { margin: 0; }
canvas { width: 100%; height: 100% }
</style>
</head>
<body>
<script src=”three.js-master/build/three.js”></script>
<script src=”three.js-master/examples/js/loaders/OBJLoader.js”></script>
<script>
var scene = new THREE.Scene();
var camera = new THREE.PerspectiveCamera( 75, window.innerWidth/window.innerHeight, 0.1, 1000 );

var directionalLight = new THREE.DirectionalLight( 0xffffff, 1 );
directionalLight.position.set( 20, 100, 20 );
scene.add( directionalLight );

var ambientLight = new THREE.AmbientLight( 0xcccccc );
scene.add( ambientLight );

var renderer = new THREE.WebGLRenderer();
renderer.setSize( window.innerWidth, window.innerHeight );
renderer.setClearColor(0xffffff, 1);
document.body.appendChild( renderer.domElement );

var geometry = new THREE.BoxGeometry( 1, 1, 1 );
var material = new THREE.MeshBasicMaterial( { color: 0x00ff00 } );
var texture = new THREE.ImageUtils.loadTexture( “mouth3d8_smooth.jpg” );
var material = new THREE.MeshLambertMaterial( { map: texture } );
var cube = new THREE.Mesh( geometry, material );
//scene.add( cube );

var mouth;

// instantiate a loader
var loader = new THREE.OBJLoader();

// load a resource
loader.load(
// resource URL
‘mouth3d19.obj’,
// Function when resource is loaded
function ( object ) {
object.traverse( function ( child ) {
if ( child instanceof THREE.Mesh ) {
mouth = object;
child.material = material;
//child.material.map = texture;
object.position.y = – 1;
scene.add( object );
}
} );

}
);

camera.position.z = 5;

var render = function () {
requestAnimationFrame( render );

mouth.rotation.x += 0.05;
mouth.rotation.y += 0.05;

renderer.render(scene, camera);
};

render();
</script>
</body>
</html>

Screen Shot 2016-05-12 at 19.19.23

Screen Shot 2016-05-12 at 19.19.44 1

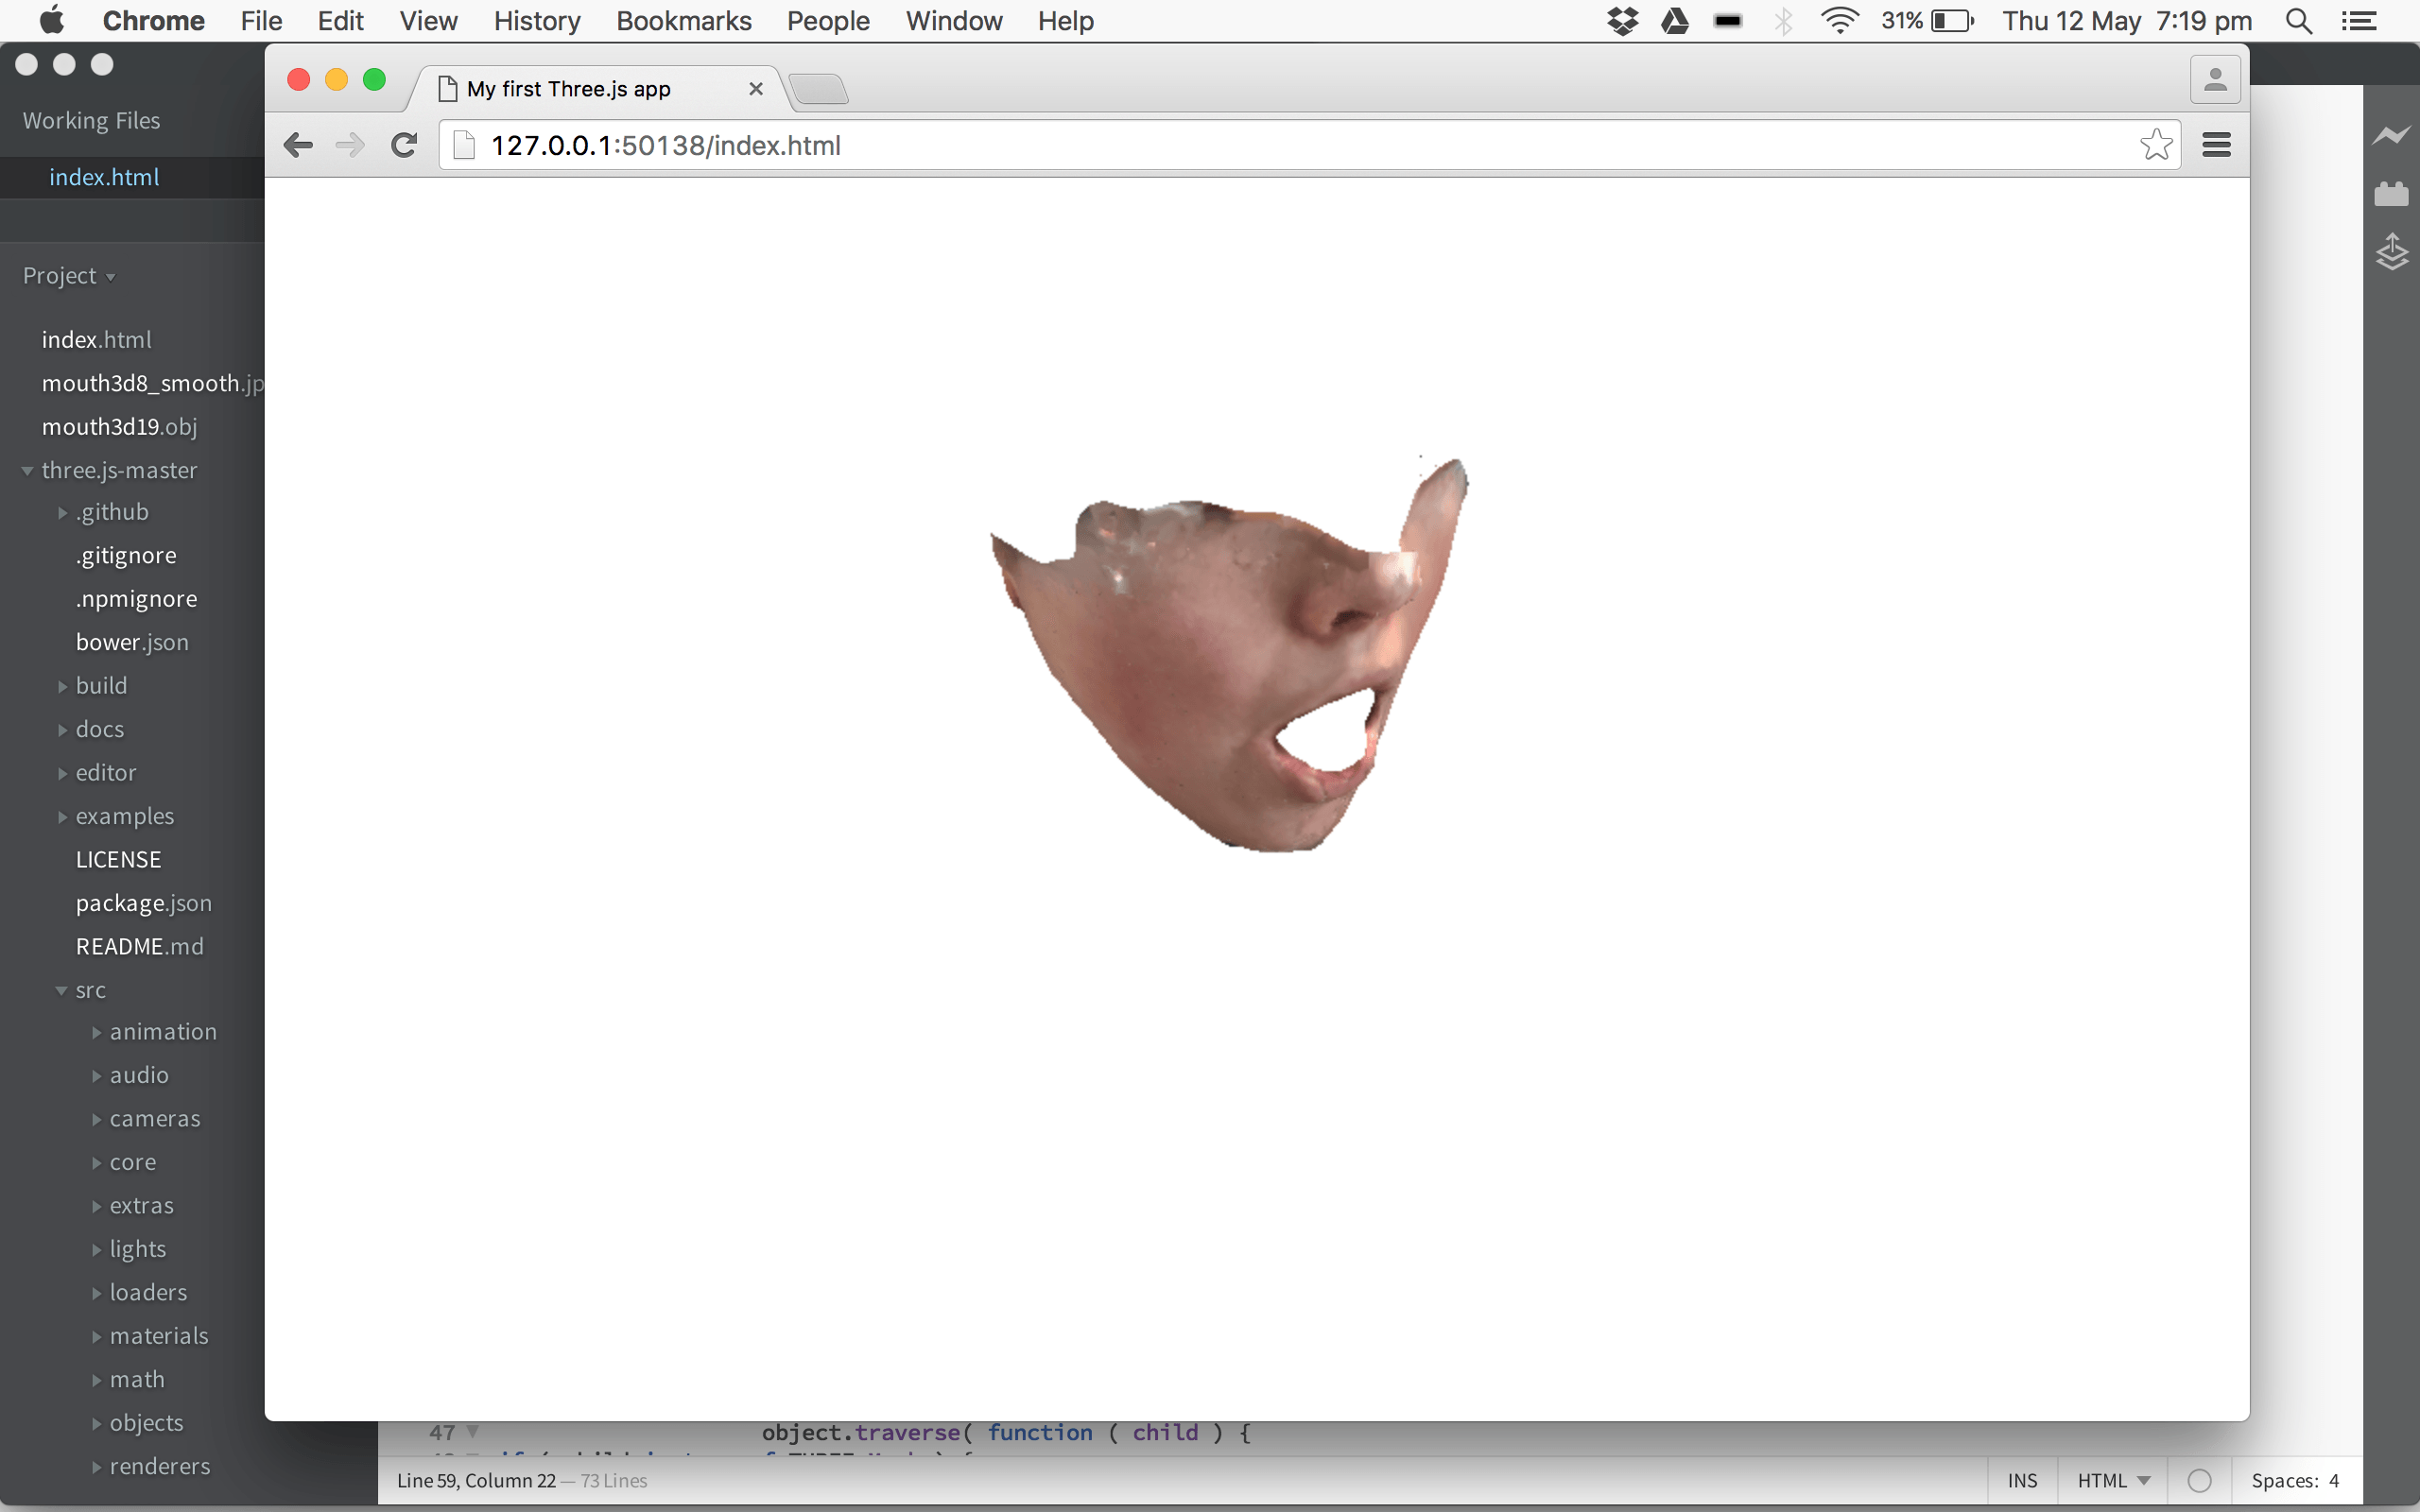
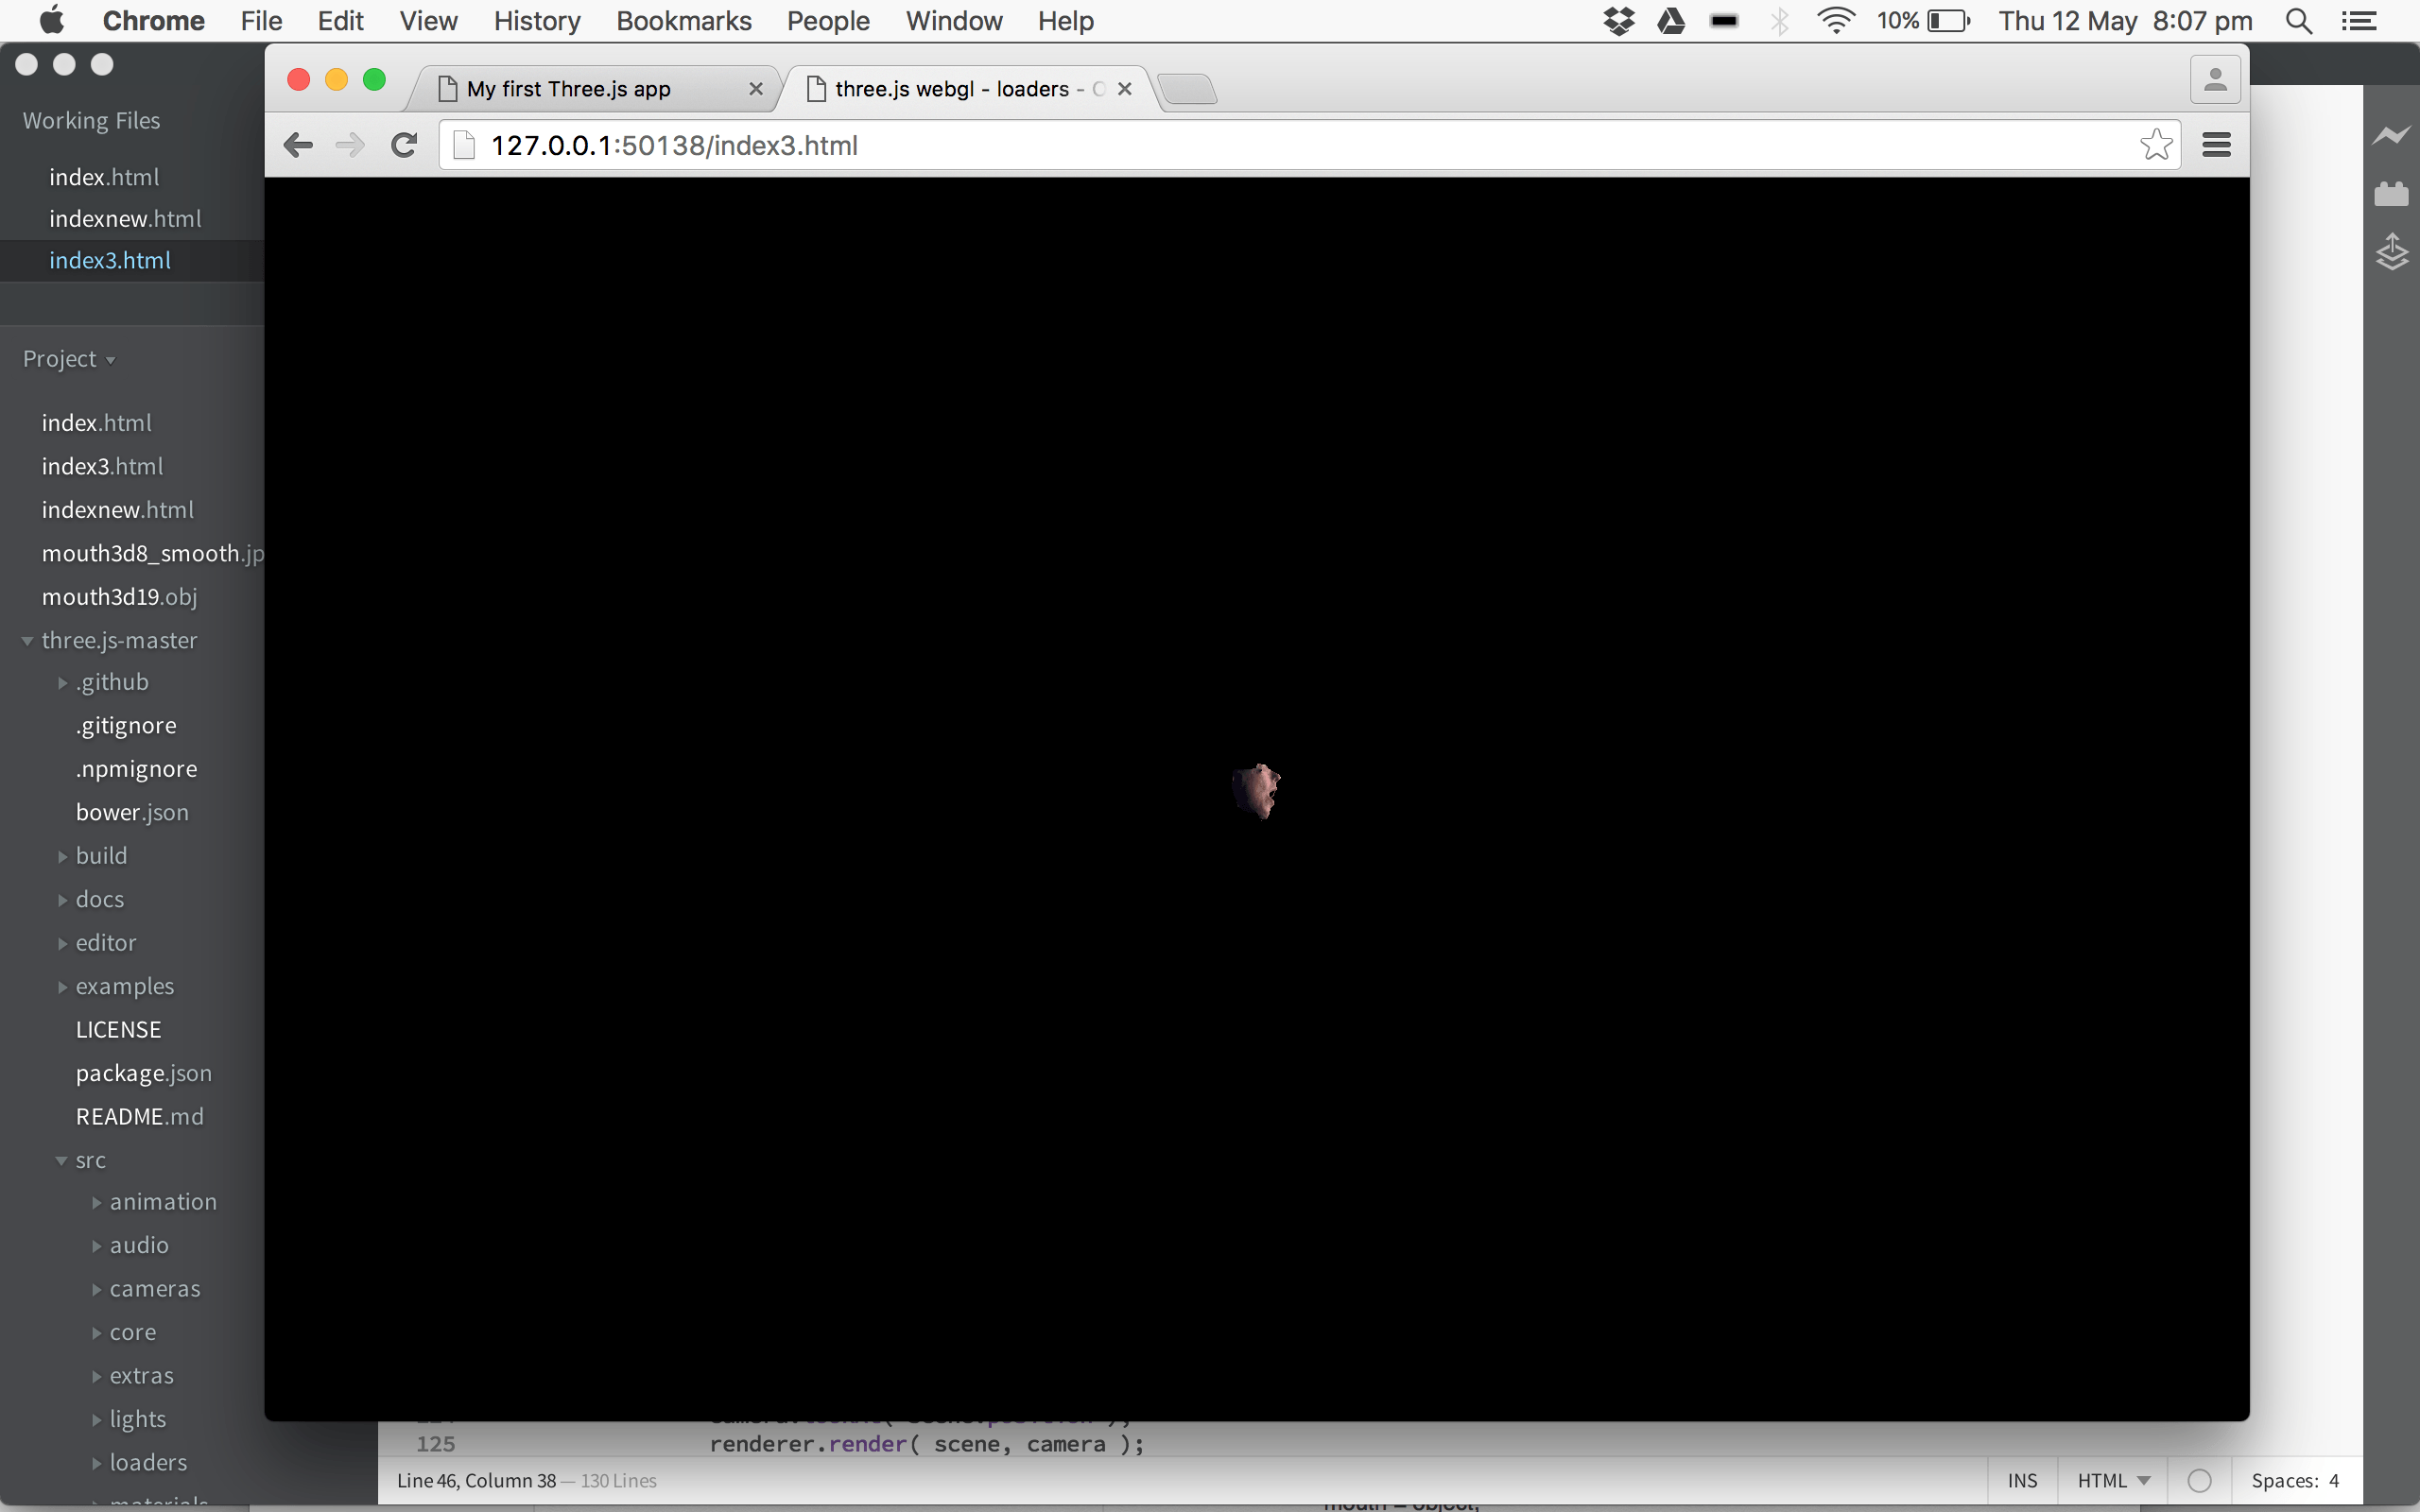
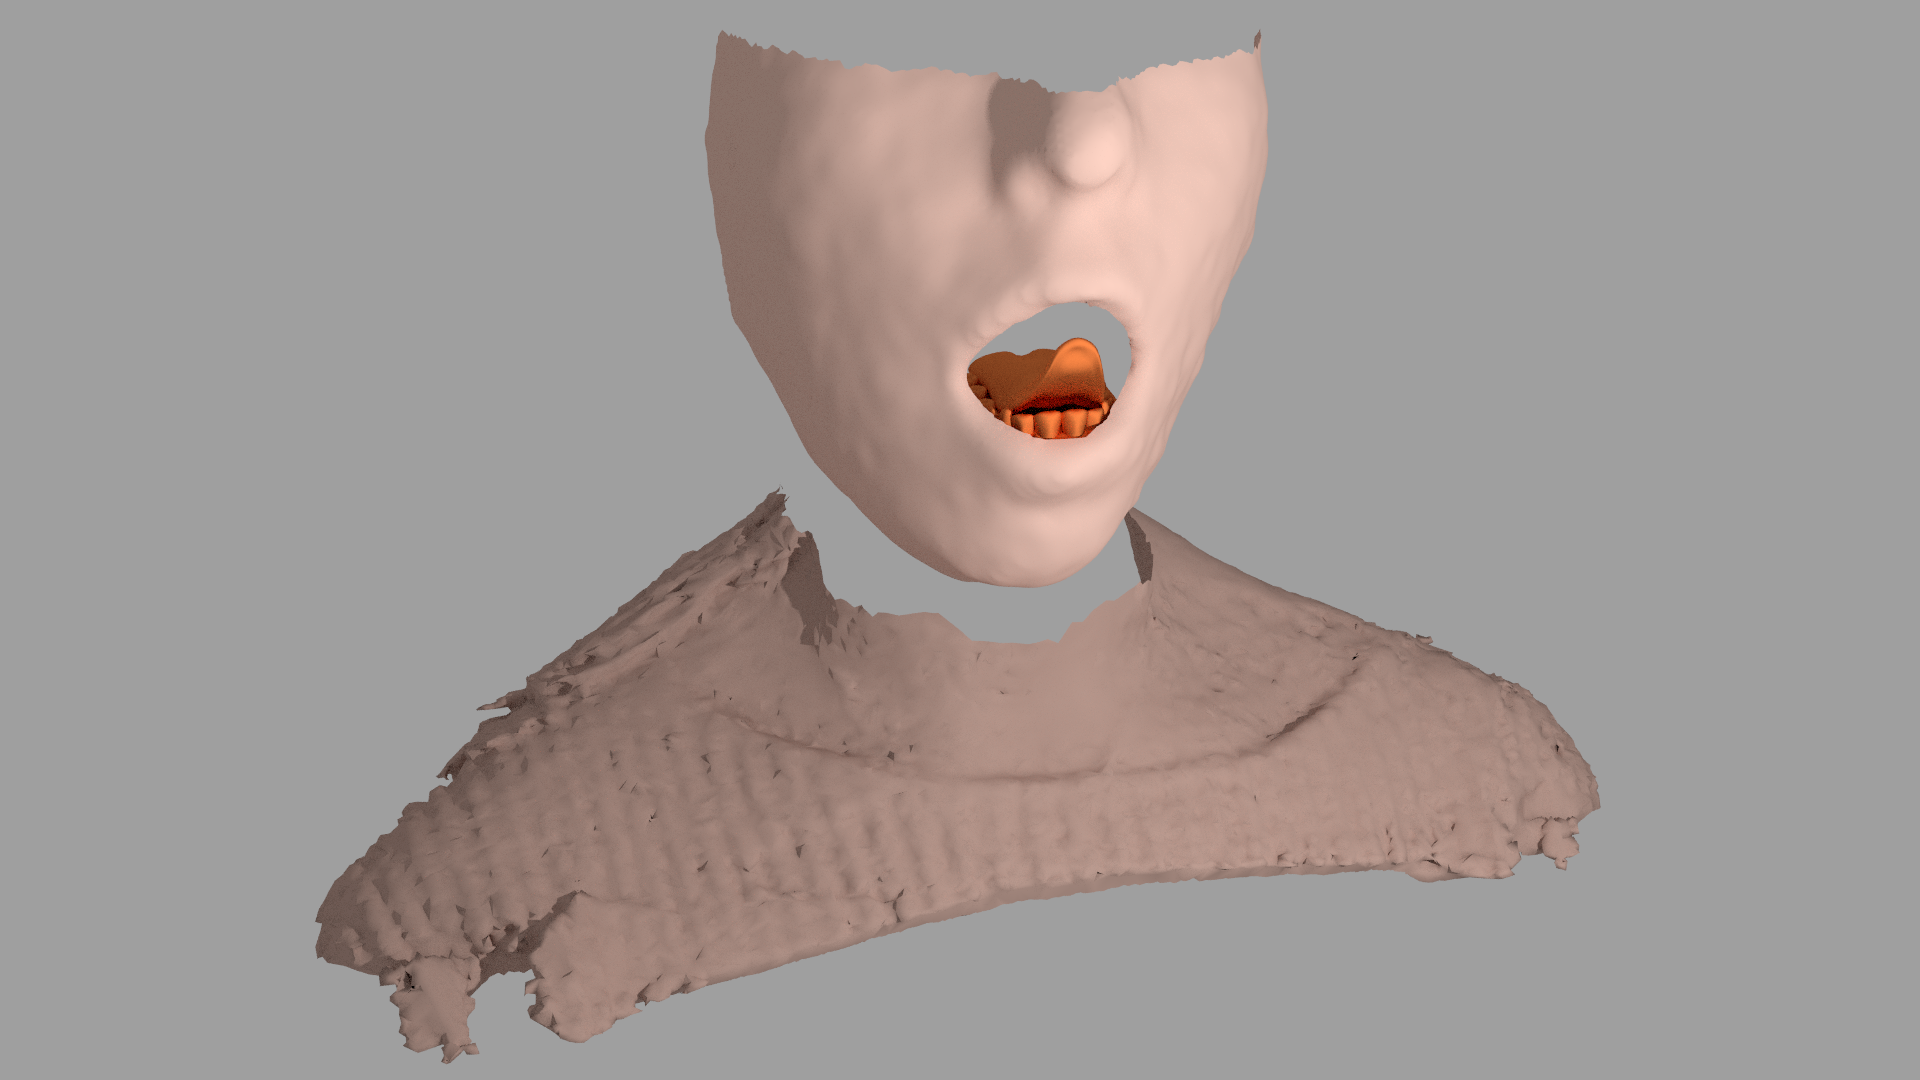
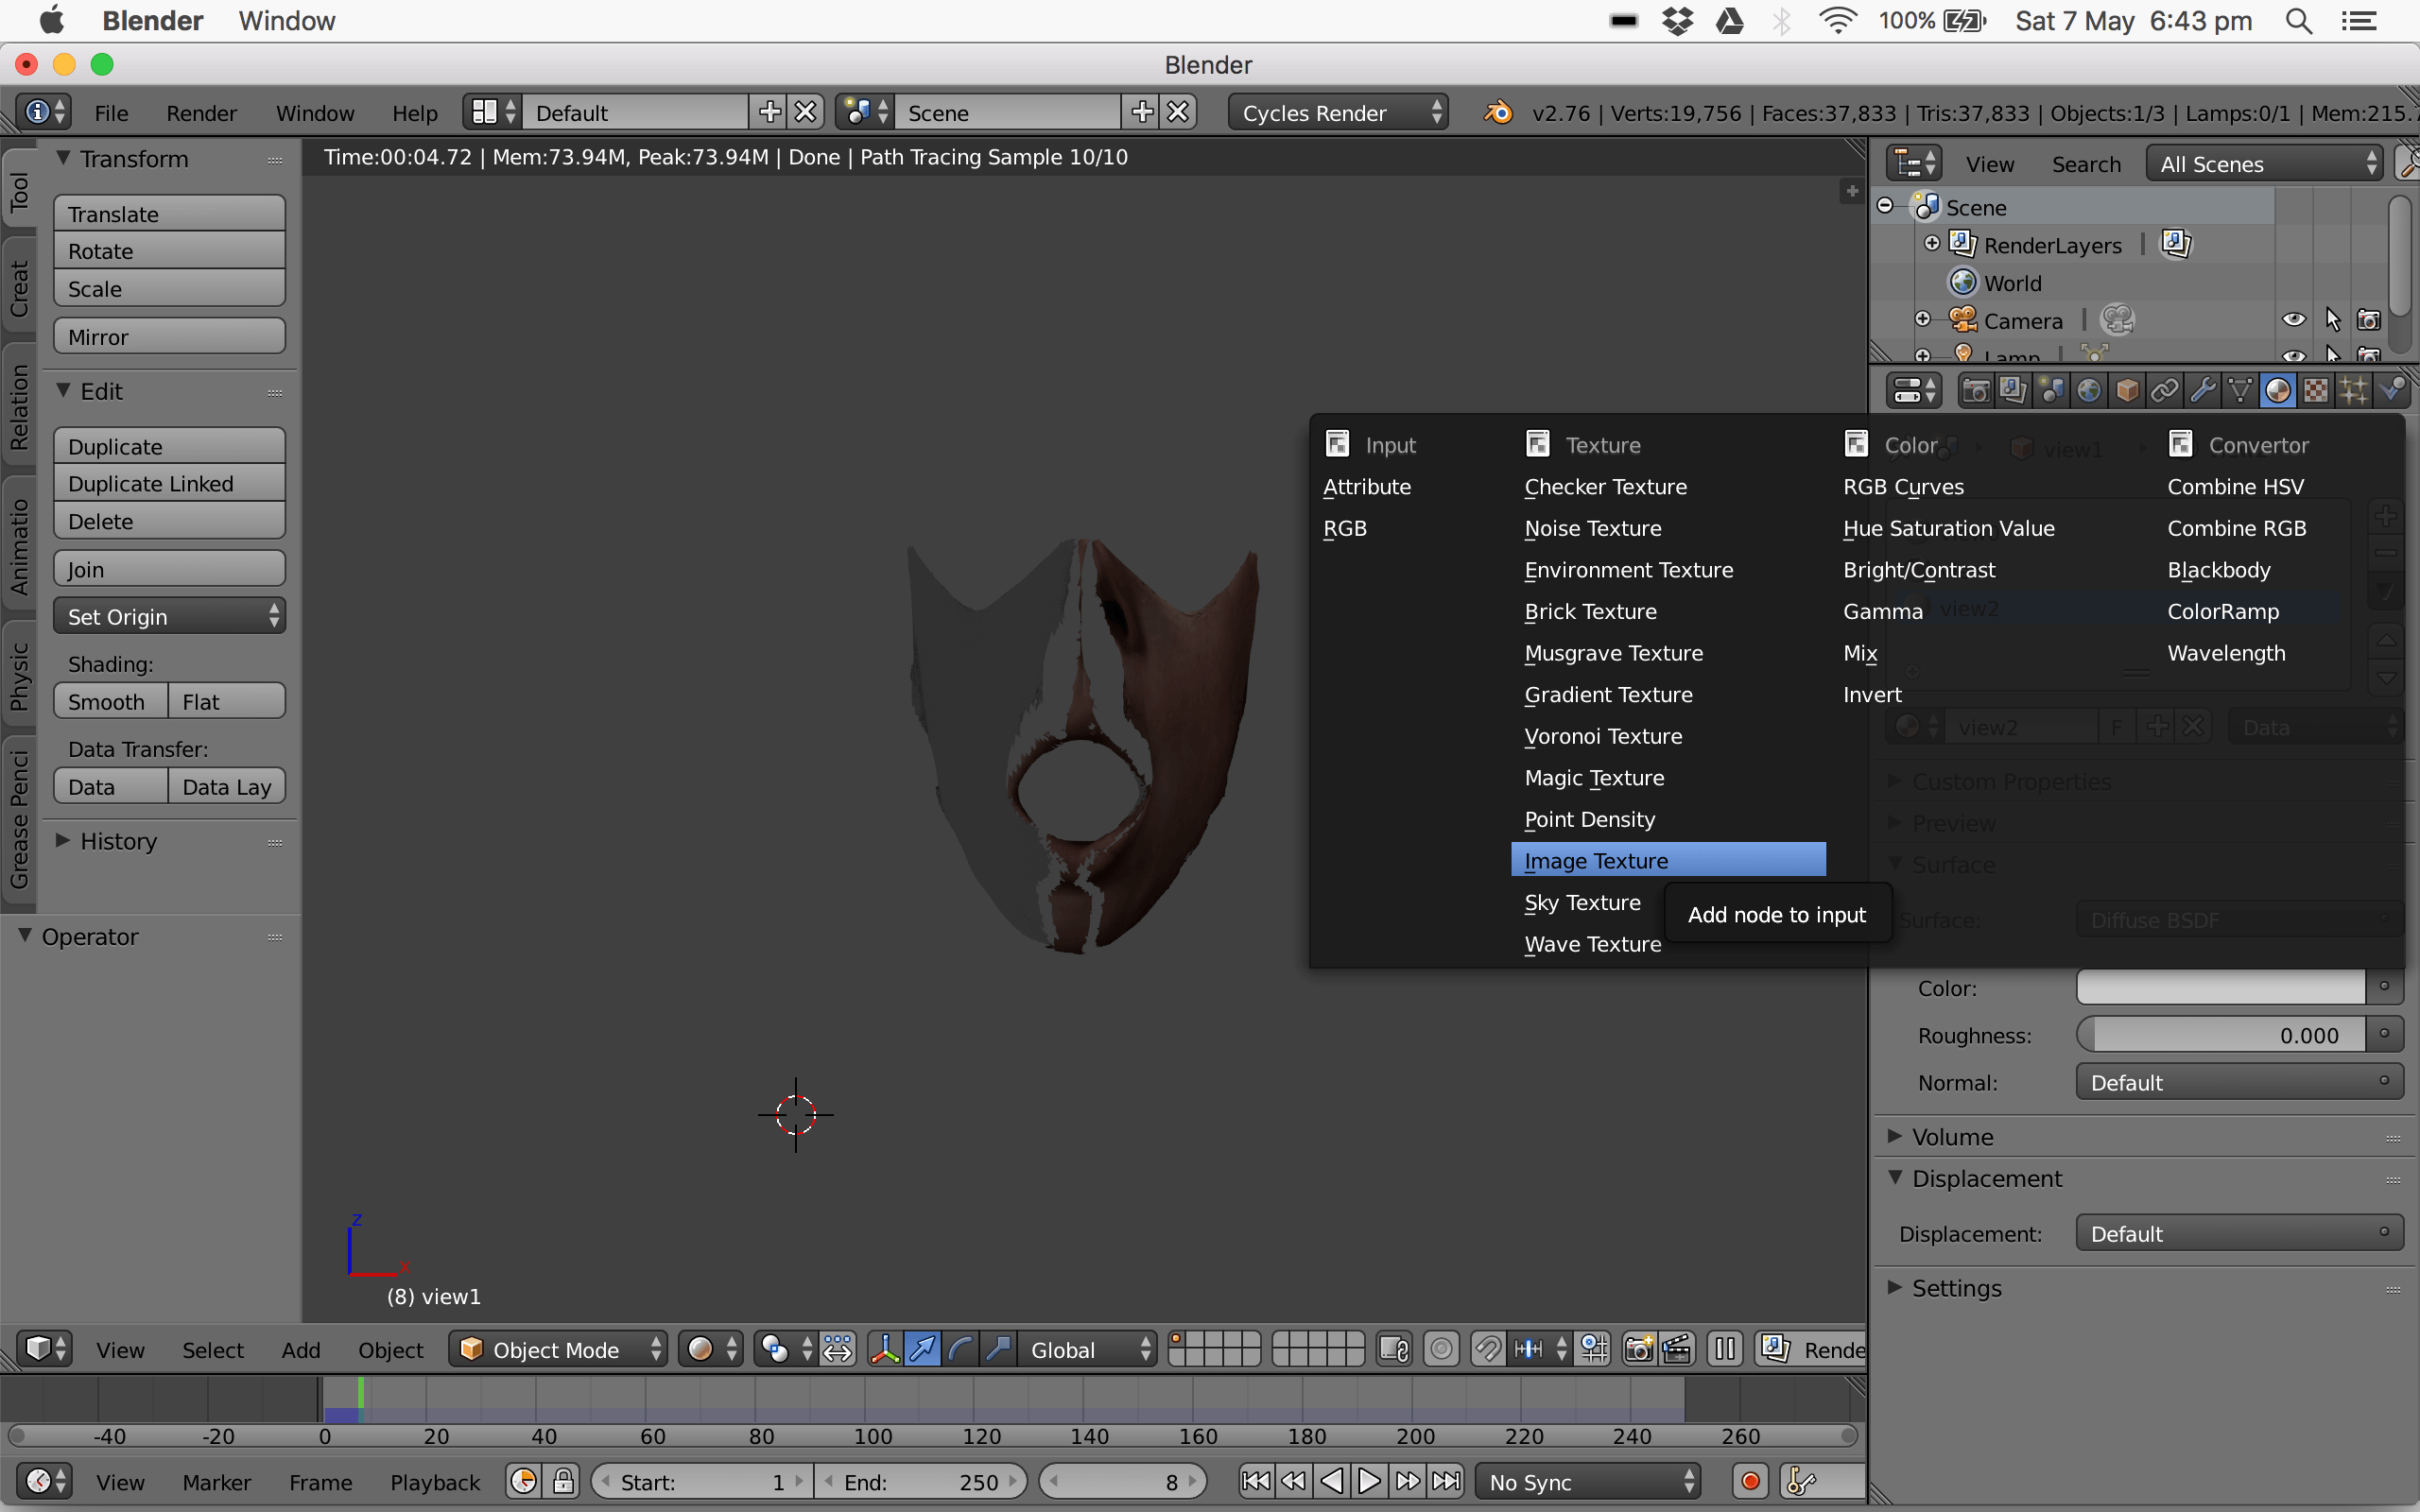
Next I attempted to follow a similar idea to this example: http://threejs.org/examples/#webgl_loader_obj. This simply reacts to the mouse, with the position altering the scale of the .obj file. This works really well with the mouth and gave it quite a creepy effect with the black background.

Here’s the code:

<!DOCTYPE html>
<html lang=”en”>
<head>
<title>three.js webgl – loaders – OBJ loader</title>
<meta charset=”utf-8″>
<meta name=”viewport” content=”width=device-width, user-scalable=no, minimum-scale=1.0, maximum-scale=1.0″>
<style>
body {
font-family: Monospace;
background-color: #000;
color: #fff;
margin: 0px;
overflow: hidden;
}
#info {
color: #fff;
position: absolute;
top: 10px;
width: 100%;
text-align: center;
z-index: 100;
display:block;
}
#info a, .button { color: #f00; font-weight: bold; text-decoration: underline; cursor: pointer }
</style>
</head>

<body>

<script src=”three.js-master/build/three.js”></script>
<script src=”three.js-master/examples/js/loaders/OBJLoader.js”></script>

<script>
var container;
var camera, scene, renderer;
var mouseX = 0, mouseY = 0;
var windowHalfX = window.innerWidth / 2;
var windowHalfY = window.innerHeight / 2;
init();
animate();
function init() {
container = document.createElement( ‘div’ );
document.body.appendChild( container );
camera = new THREE.PerspectiveCamera( 45, window.innerWidth / window.innerHeight, 1, 2000 );
camera.position.z = 5;

// scene
scene = new THREE.Scene();
var ambient = new THREE.AmbientLight( 0x101030 );
scene.add( ambient );
var directionalLight = new THREE.DirectionalLight( 0xffeedd );
directionalLight.position.set( 0, 0, 1 );
scene.add( directionalLight );

// texture
var manager = new THREE.LoadingManager();
manager.onProgress = function ( item, loaded, total ) {
console.log( item, loaded, total );
};
var texture = new THREE.Texture();
var onProgress = function ( xhr ) {
if ( xhr.lengthComputable ) {
var percentComplete = xhr.loaded / xhr.total * 100;
console.log( Math.round(percentComplete, 2) + ‘% downloaded’ );
}
};
var onError = function ( xhr ) {
};
var loader = new THREE.ImageLoader( manager );
loader.load( ‘mouth3d8_smooth.jpg’, function ( image ) {
texture.image = image;
texture.needsUpdate = true;
} );

// model
var loader = new THREE.OBJLoader( manager );
loader.load( ‘mouth3d19.obj’, function ( object ) {
object.traverse( function ( child ) {
if ( child instanceof THREE.Mesh ) {
child.material.map = texture;
}
} );
object.position.y = – 1;
scene.add( object );
}, onProgress, onError );

//
renderer = new THREE.WebGLRenderer();
renderer.setPixelRatio( window.devicePixelRatio );
renderer.setSize( window.innerWidth, window.innerHeight );
container.appendChild( renderer.domElement );
document.addEventListener( ‘mousemove’, onDocumentMouseMove, false );

//
window.addEventListener( ‘resize’, onWindowResize, false );
}
function onWindowResize() {
windowHalfX = window.innerWidth / 2;
windowHalfY = window.innerHeight / 2;
camera.aspect = window.innerWidth / window.innerHeight;
camera.updateProjectionMatrix();
renderer.setSize( window.innerWidth, window.innerHeight );
}
function onDocumentMouseMove( event ) {
mouseX = ( event.clientX – windowHalfX ) / 2;
mouseY = ( event.clientY – windowHalfY ) / 2;
}

//
function animate() {
requestAnimationFrame( animate );
render();
}
function render() {
camera.position.x += ( mouseX – camera.position.x ) * .05;
camera.position.y += ( – mouseY – camera.position.y ) * .05;
camera.lookAt( scene.position );
renderer.render( scene, camera );
}
</script>

</body>
</html>

Screen Shot 2016-05-12 at 20.07.34

Screen Shot 2016-05-12 at 20.07.46

Standard
Experiments

Human < > Rubber

After experimenting with silk I decided it would more effectively communicate my research by exploring a completely man-made material in the form of rubber. I decided to simulate this reacting to different objects rather than just reacting to gravity, this provides an interesting collision aspect where the faces collide with its surroundings and this in turn alters its material perception. At first I kept the skin texture of the face, but as I was simulating rubber I decided to also experiment with creating a more plastic texture with garish colours to further show the synthetic qualities. This culminated in an experiment whereby the synthetic face collided with the human face, I particularly like the final effect of this as it is the coming together of the border between one and the other and when faced with this the reaction is unpredictable.

Screen Shot 2016-05-07 at 20.41.02

Screen Shot 2016-05-07 at 21.26.22

Screen Shot 2016-05-08 at 14.15.05

Screen Shot 2016-05-08 at 15.23.33

Screen Shot 2016-05-08 at 16.19.49

Screen Shot 2016-05-08 at 16.38.04

Standard
Experiments

Human < > Fabric

I then decided to experiment further with the simulation of materials and the uncanny effect that can be achieved when the object initially appears one material, but is in fact another once animated. I achieved this initially with the cloth simulation using silk fabric, converting the face to silk that was pinned in certain places to alter how the material would then react. I did this with both a model made with Seene and with Photoscan, it was interesting to see how each reacted with the Seene model ripping apart much more and appearing more fragile. Keeping the actual texture of the models gives these simulations an eery effect, playing with your perceptions of what is real and in turn what is natural. Does the fact you perceive skin make the object natural? Or because it morphs into a synthetic material?

Whilst these are very effective, the fact the material is silk does still keep the objects in the realm of the natural. It would perhaps be better to experiment with true synthetic/ man-made materials such as rubber or silicone.

Screen Shot 2016-05-07 at 16.22.37

Screen Shot 2016-05-07 at 16.30.49

Screen Shot 2016-05-07 at 16.56.38

Screen Shot 2016-05-07 at 19.23.17

Screen Shot 2016-05-07 at 18.43.44

Standard